ESP32 Arduino Core Quick Start
The following instructions should work for any development board or module that can run the ESP32 Arduino Core library. If your project uses the Arduino Core library the steps below illustrate how to modify your firmware so your devices connect to Deploy the Fleet for updates.
Video Walkthrough
Sample Project
If you already have a project or product using the Arduino Core library you can skip this section. If you are starting from scratch this section will walk you through getting a sample project ready for integration with Deploy the Fleet.
Before continuing, follow the ESP32 Arduino Core instructions for installing the library if you haven’t already done so.
- Launch the Arduino IDE
- From the Tools->Board->ESP32 Arduino menu select the appropriate board for your hardware.
-
Create a new sketch with the following contents
#include <WiFi.h> #include <WiFiMulti.h> #define WIFI_SSID "[YOUR WIFI SSID]" #define WIFI_PASSWORD "[YOUR WIFI PASSWORD]" String CURRENT_VERSION = "1.0.0"; WiFiMulti WiFiMulti; void setup() { Serial.begin(115200); Serial.println("Deploy the Fleet ESP32 Example"); for (uint8_t t = 4; t > 0; t--) { Serial.printf("[SETUP] WAIT %d...\n", t); Serial.flush(); delay(1000); } WiFi.mode(WIFI_STA); WiFiMulti.addAP(WIFI_SSID, WIFI_PASSWORD); } void loop() { // wait for WiFi connection if ((WiFiMulti.run() == WL_CONNECTED)) { Serial.println("This is version " + CURRENT_VERSION); delay(5000); } } - Replace [YOUR WIFI SSID] with your actual WiFi network SSID name.
- Replace [YOUR WIFI PASSWORD] with your actual WiFi password.
- Compile the project by clicking the Verify button or using the Ctrl-R keyboard shortcut.
- Connect your hardware.
- Upload the firmware by clicking the Upload button or using the Ctrl-U keyboard shortcut.
- Open the Serial Monitor and set the baud rate to 115200
-
You should see output similar to the following
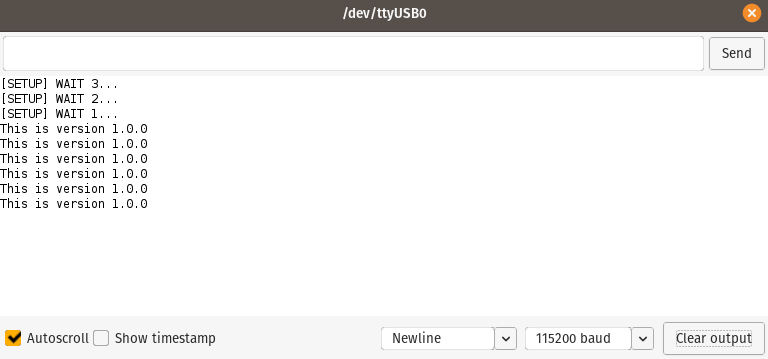
The sample project is a very simple firmware that repeatedly outputs the current version over serial. You are now ready to modify your project to use Deploy the Fleet as the update service.
Integrate With Deploy the Fleet
In this section you will modify your existing firmware which will allow you to manage updates via Deploy the Fleet going forward.
Install the DTF_ESP8266Update Library
To make the integration as easy as possible we created an Arduino library. It can be installed from the built-in Arduino library manager or by importing a zip file.
Using Library Manager (recommended)
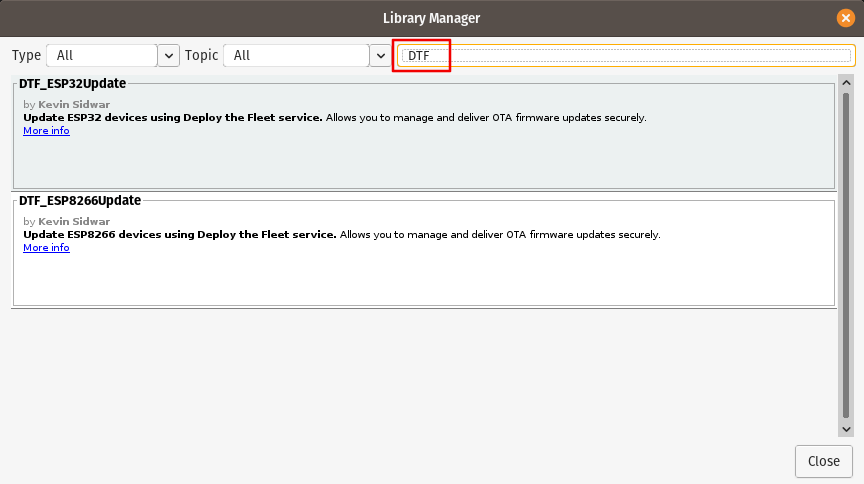
- From the Sketch menu select Include Library->Manage Libraries. The Library Manager dialog will open
- In the filter field enter “DTF” to filter the results
- Install the latest version of the DTF_ESP32Update library.
Import ZIP File
- Download the latest released zip file from https://github.com/deploythefleet/arduino_esp32_update/releases
- From the Sketch menu select Include Library->Add .ZIP Library
- Navigate to the location where you saved the ZIP file in step 1, select it, and click OK.
Updates from Deploy the Fleet
As a trivial example we’ll have the firmware check for an update as soon as it is connected to the network. Depending on your firmware and use case you could trigger the firmware update process with the press of a button or some other event that contextually makes sense.
Make sure the library header is included at the top of your sketch file.
#include <DTF_ESP32Update.h>
If you are using the sample project we just created replace your loop function with the following code. Make sure you replace DTF_UPDATE_URL with the URL found on your Deploy the Fleet dashboard.
void loop() {
  static bool checkedForUpdates = false;

  // wait for WiFi connection
  if ((WiFiMulti.run() == WL_CONNECTED)) {
    if (!checkedForUpdates)
    {
      checkedForUpdates = true;
      DTF_ESP32Update::getFirmwareUpdate(DTF_UPDATE_URL, CURRENT_VERSION.c_str());
    }
    Serial.println("This is version " + CURRENT_VERSION);
    delay(5000);
  }
}
If instead you are integrating Deploy the Fleet with an existing project all you need to do is add the following line of code wherever you would like the update process to occur.
DTF_ESP32Update::getFirmwareUpdate("YOUR DTF UPDATE URL", "CURRENT VERSION i.e. 1.0.0");
IMPORTANT: Make sure you replace the URL and firmware version placeholders in the above code with your own values. The update URL can be found on the main dashboard for your product.
Export Firmware From Arduino IDE
Before you can upload your firmware to Deploy the Fleet you need to export it from the Arduino IDE.
- Compile the project by clicking the Verify button or using the Ctrl-R keyboard shortcut.
- Export the firmware binary using the menu Sketch->Export compiled Binary or using the Ctrl-Alt-S keyboard shortcut.
Your firmware binary will be exported to the same folder where your sketch is located.
OTA PARTITION SIZE: Make sure your configured OTA partition size is sufficient for the size of your exported firmware binary. This can be configured via the Tools->Partition Scheme menu in the Arduino IDE.
WARNING: Deploy the Fleet can not validate that your firmware binary will fit in your device’s OTA partition. You should validate this prior to uploading the firmware. The Arduino Core library will fail and skip any update that is too large to fit in the OTA partition.
Upload Firmware to your Device
Now that you’ve made your firmware Deploy the Fleet aware upload it to your device.
- Upload the modified firmware by clicking the Upload button or using the Ctrl-U keyboard shortcut.
Upload Firmware to Deploy the Fleet
- Open Deploy the Fleet.
- Create a product if you don’t already have one.
- Navigate to the Firmware page.
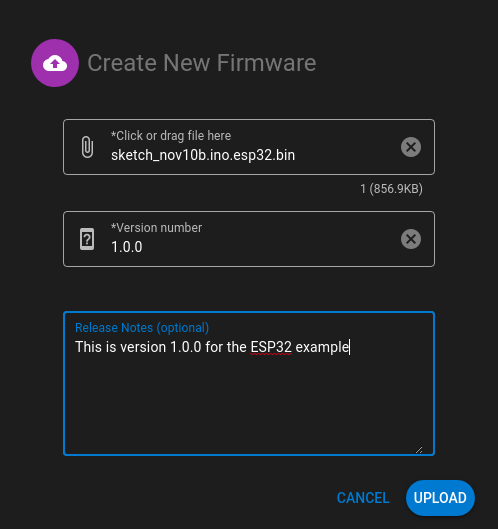
- Click Upload A New Firmware
- Select the firmware binary
- Set the version to the same value used in the firmware code. In our example we set it as 1.0.0 but you may have set it differently for your project.
- Optionally add any release notes
-
Click Upload
Since this is the first firmware for your product it will automatically be marked as the default.
Your First Update
Now that everything in your firmware is configured let’s create an update.
- Modify the
CURRENT_VERSIONvariable to be 2.0.0. - Compile the project by clicking the Verify button or using the Ctrl-R keyboard shortcut.
- Export the firmware binary using the menu Sketch->Export compiled Binary or using the Ctrl-Alt-S keyboard shortcut.
- Open Deploy the Fleet.
- Navigate to the Firmware page.
- Click Upload A New Firmware
- Select the newly created firmware binary
- Set the version to 2.0.0.
- Select Mark as product default
- Optionally add any release notes
- Click Upload
- Reset your device
Your device should update and start outputting the new message indicating it is running version 2.0.0.